
How to run Facebook ads for webinars without a complex funnel
 Written by Benjamin Boman · · 8 min read
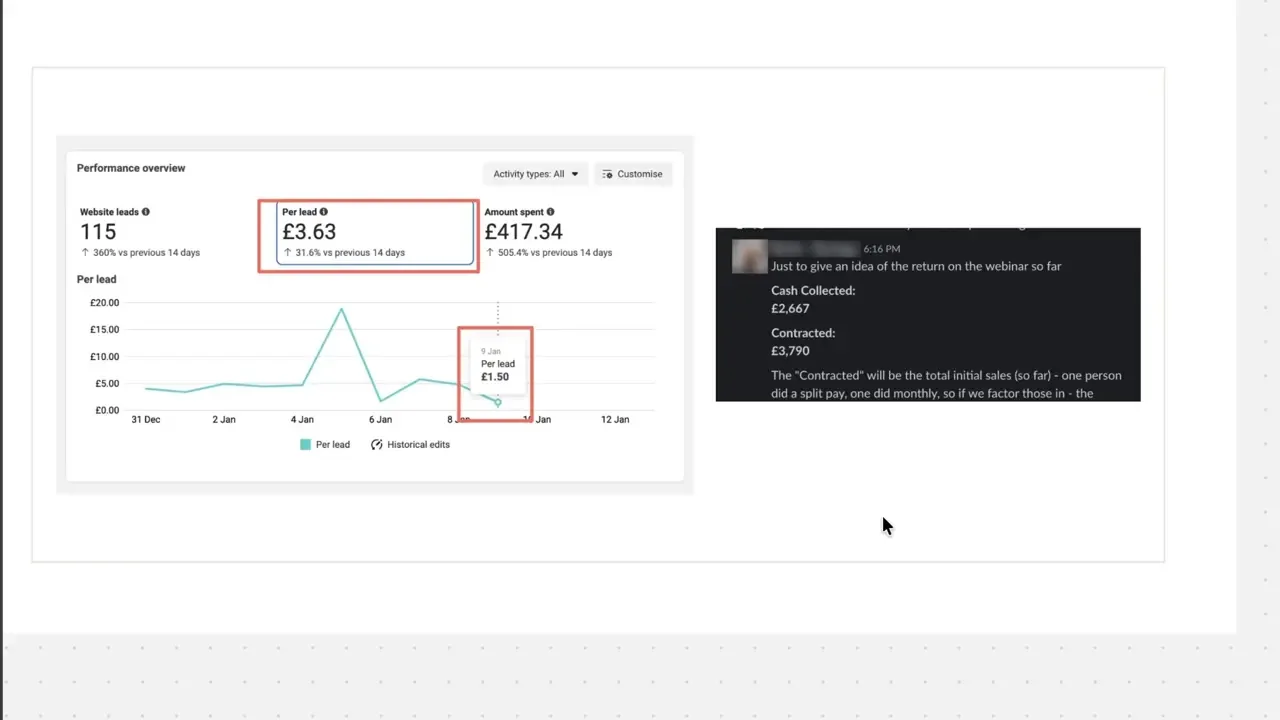
Webinar funnels don’t need to be crazy complicated. This is the full setup I used for a health coach: we spent around £420 and got around £3,800 back. It covers:
- The main thing you need to get right first: the topic
- What ads to make, and a simple video script
- How to build the funnel: landing page and thank you page
- Tracking and automations
- The ad settings, budget and kill rule
For an older, more detailed version of this, see how to get webinar signups with Facebook ads.
Transcript
Webinars, Facebook ads and funnels don’t need to be crazy complicated. Here’s the full setup and strategy I use to run Facebook ads for this health coach. We spent around £420, and we managed to snag around £3,800 off the back of that.
So I’m going to go through:
- What’s the main thing you need to get it to work?
- Exactly what to use in the creative and copy
- How to build the funnel
- What ad settings to use
Pick the topic
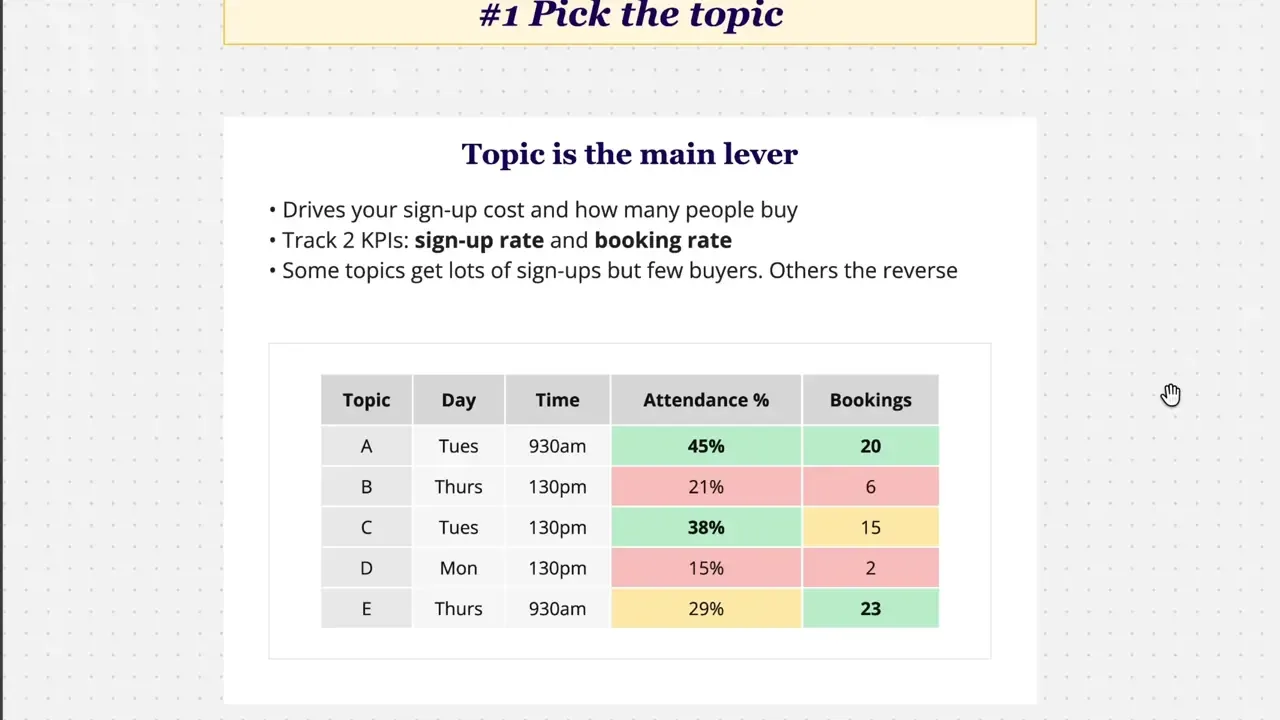
The number one thing you need to work out to begin with is the topic. The topic will drive the performance of the campaign overall.
There are two major KPIs you need to balance here:
- The sign-up rate
- The booking rate
Obviously, you’d want a really great sign-up rate and a great booking rate. But there’s a temptation to pick topics that have a high booking rate even if they have a low sign-up rate.
That’s not a great idea for Meta, because we have such a short window to promote the webinar. We need something that’s an easy win for Meta to pick up steam, but still has the commercial viability of getting people to sign up for calls during the campaign.
So you need to find a balance of those two numbers. Find something that has a good sign-up rate and also a good booking rate. Not just something that has a good booking rate.
If you haven’t yet, I suggest working organically first before you go to Facebook ads, unless you see Facebook ads as an experimentation budget. In which case, don’t expect a high ROI out of it.
When you experiment, I’d suggest:
- Picking one topic at a time, and doing one per month
- Testing which day of the week and what time of day you run the webinar
Different days of the week can perform completely differently. Monday versus Friday, for example, but also the time of day: morning, afternoon, evening. And it’s going to be different for your audience.
There are a lot of benchmark pages on the web saying “your attendance rate should be this much for this day of the week”. It actually varies a lot depending on your audience. If you target younger people, for example, they may not be able to attend during the work day. Other audiences may be really active on the weekend.
So you’ve got to find that out before you run the ads. Otherwise, the ads themselves are going to be tests of this.
What ads to make
Aim for three to five ads. You can go five to ten if you have a really big budget, but five is a good rule of thumb. Then just use simple images and video.
Images
This is Adspo, an ad profiling tool. If you look at the longest-running image ads that promote live webinars, they basically all have:
- A headline
- The topic
- A CTA
- An image of who’s speaking
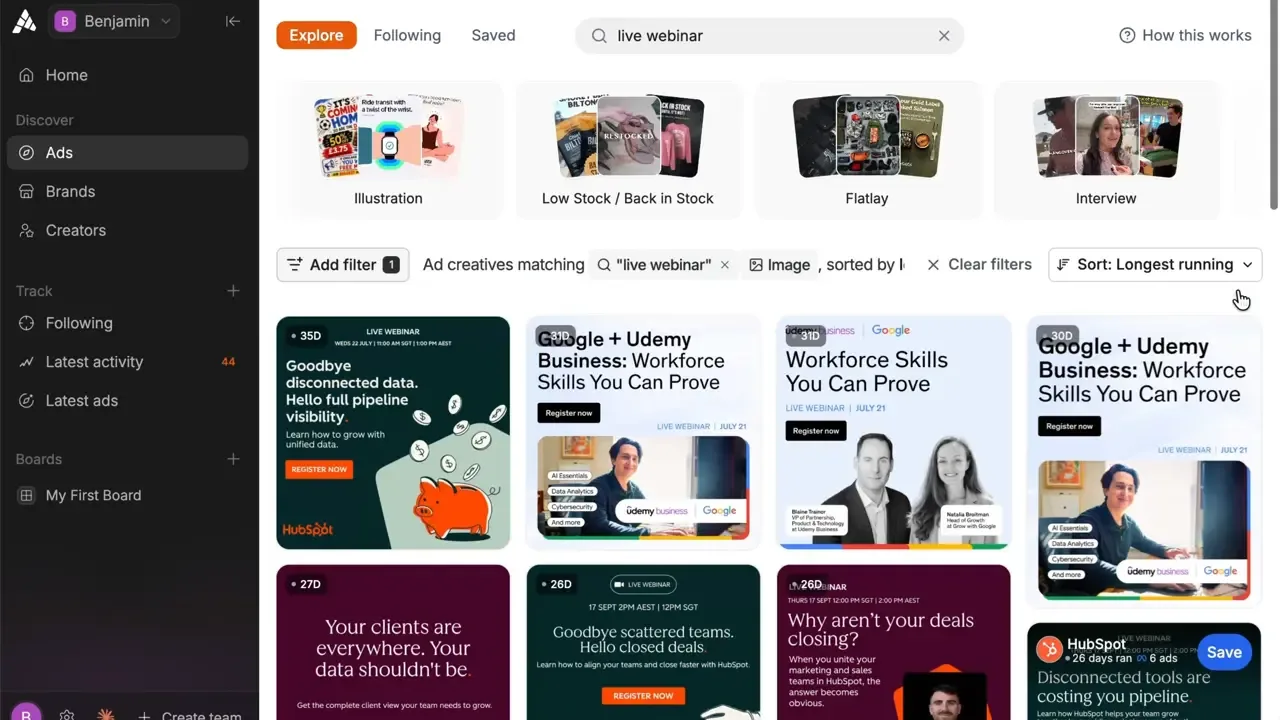
It’s really simple. I don’t think you need to overcomplicate this. Stick to the basics for those images, at least to start with, and then you can experiment with more creative ideas in the next webinar campaigns you run.
If you want more ideas, here’s my swipe file of ad inspiration.
Videos
For videos, use UGC. This is what I mean by UGC: it’s typically people talking to the camera and saying some kind of script.
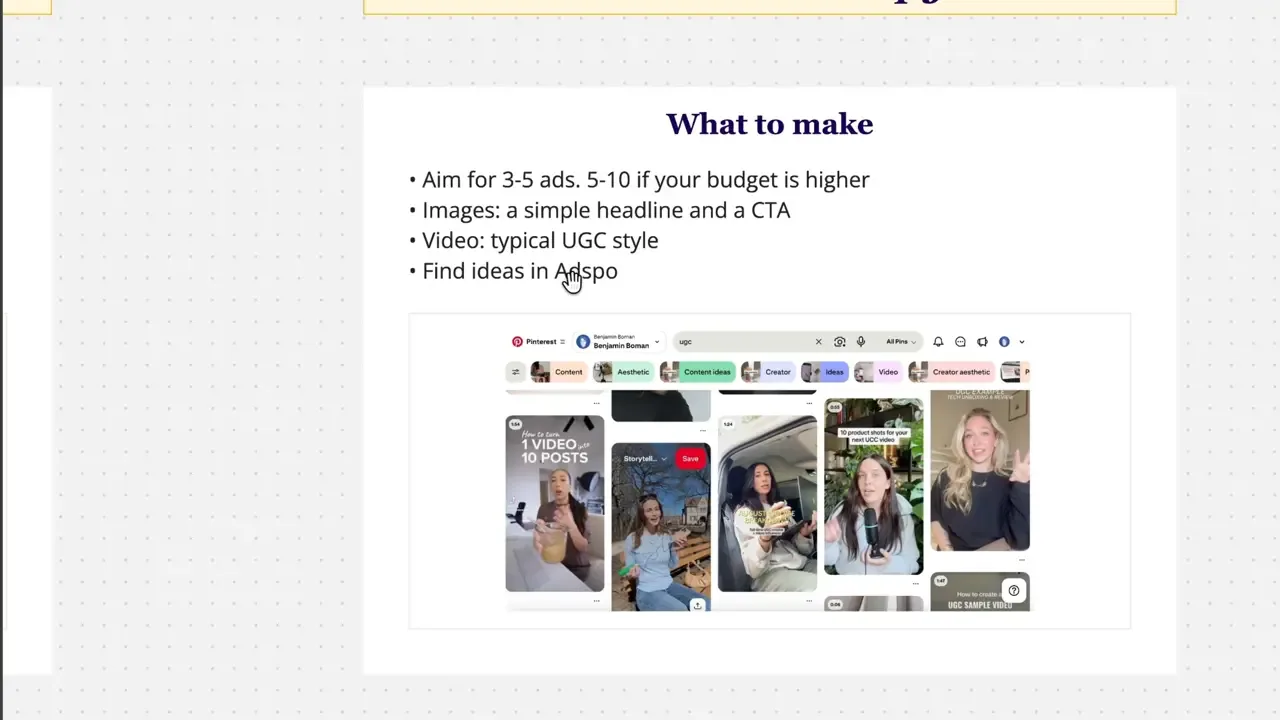
So what script do you use? The easiest one is the pain, agitate, solution script, also called PAS:
- Start with the pain point, which is usually how you call out your ideal market
- Agitate that pain point
- Offer your solution
- Then a CTA
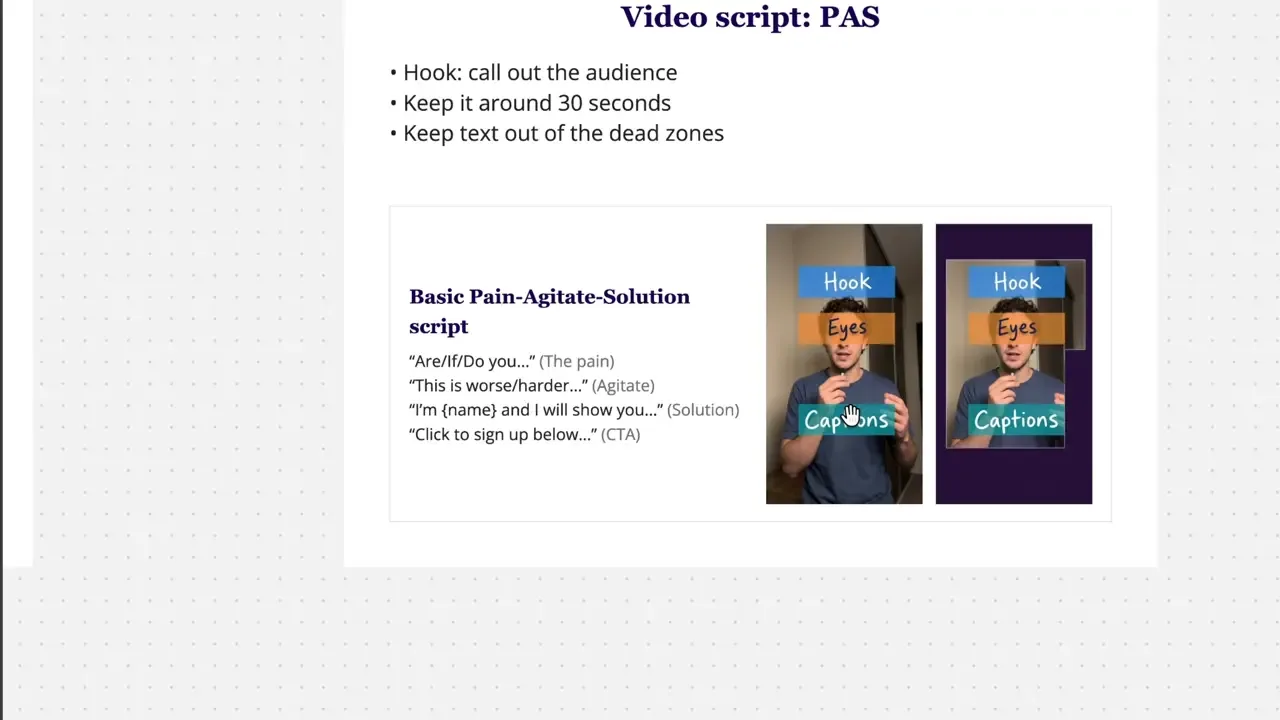
An example might be:
Are you confused by all the different funnel setups you can use to promote webinars? It gets even worse when you jump on YouTube and see 10 different videos that say 10 different things. My name’s Ben. I’m going to show you the three steps you need to run simple webinars with Meta ads that actually work. Click the link below to sign up and join my webinar next Thursday at this time.
That’s a very simple script.
Also keep in mind, when you record the video, set up the frame so your eyes are towards the top third. You still want space for the text lying over the top, and space for the captions under your chin, because Reels will cut off a lot at the bottom and the top.
The funnel
The funnel doesn’t need to be anything crazy complicated.
The landing page
Basically, you have a landing page. These are two designs I’ve used in the past.
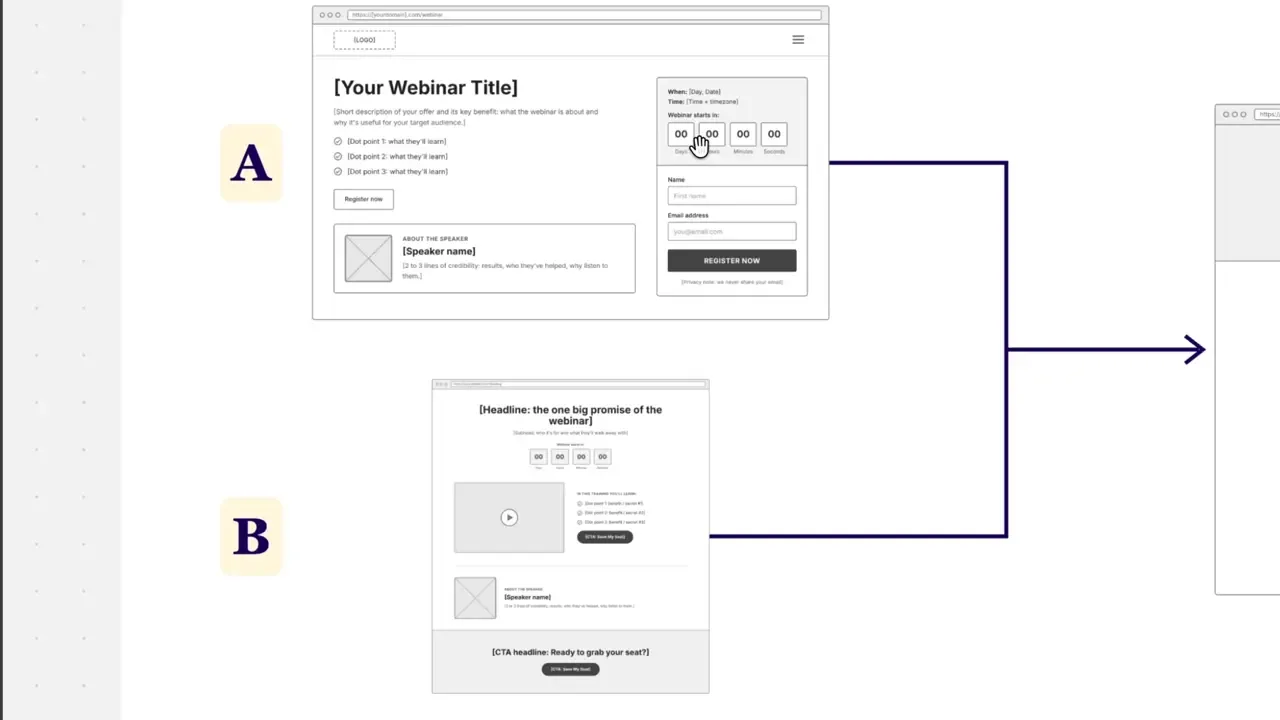
Usually it’s got:
- The webinar title
- A sub-headline describing the value you’ll communicate in the webinar
- Dot points for the key takeaways or benefits
- A countdown timer
- A speaker box
The countdown timer is really important. I have a theory that without one, people don’t quite understand when it’s happening, or that it’s happening very soon.
The difference between these two designs, apart from one being horizontal and one more vertical, is that one has a video. If you have the resources, you can record a pitch video and use that layout.
The thank you page
The thank you page is where you can bump people to your second offer.
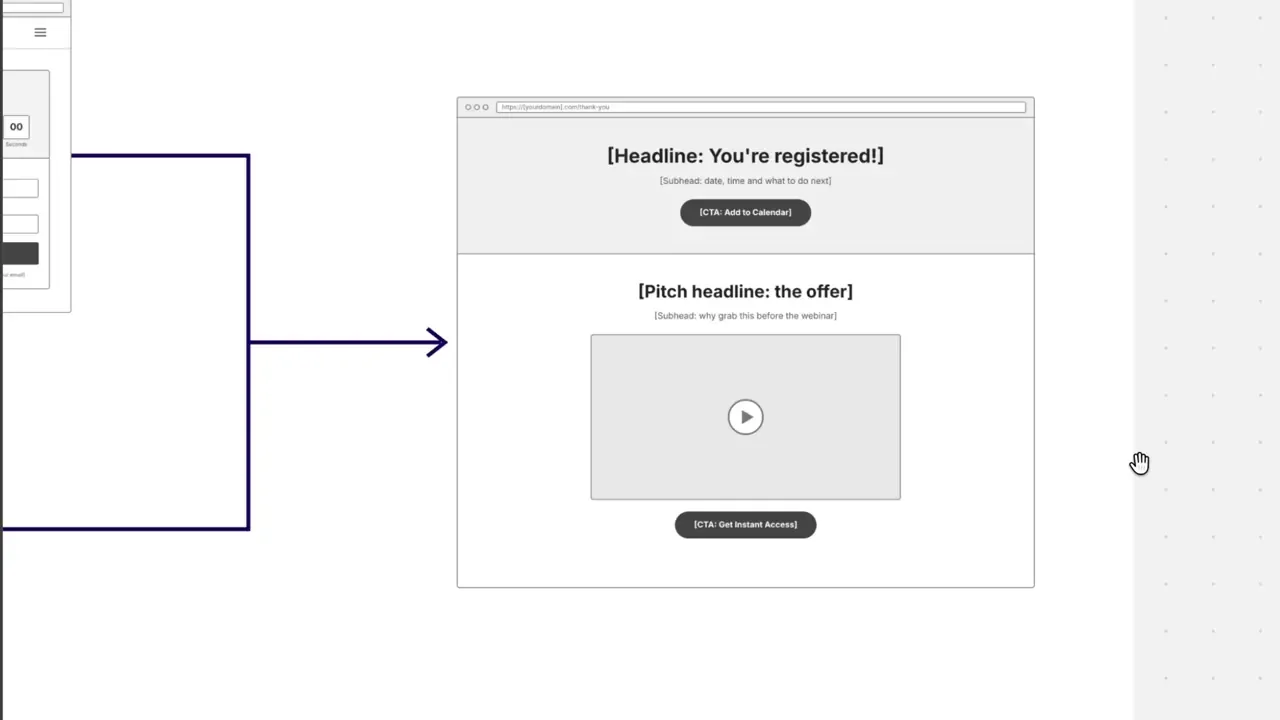
The simplest second offer is bumping people to a Skool group or a Facebook group. Something like: “Thanks for registering. While you’re here, join our Facebook group. Here’s the link below.”
If you want to go one step further, you can bump a call, because people are in their most motivated state right when they sign up for the webinar. So if you want to sell something like a sales call or a consultation, this is the time to do it.
Put a little pitch video for your call, then your CTA button. If you like, you can even embed the calendar at the bottom of the page, so people just scroll down rather than click through to your calendar.
One quick thing on the funnel: if you want to run it automated, I suggest WebinarFuel. This video isn’t about automated webinars, but they’re a really cool company, so check them out.
Tracking
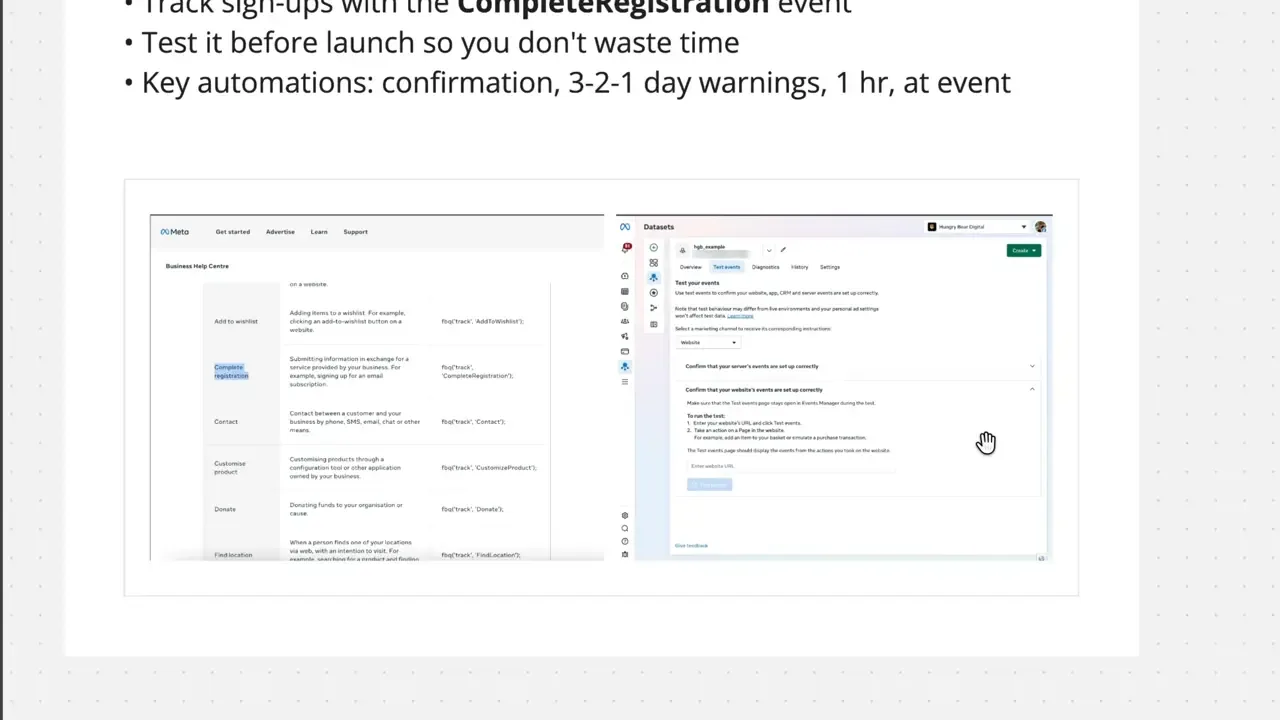
Meta has a set of standard pixel events. You can see add to wishlist, complete registration, contact and so on, including purchase and lead.
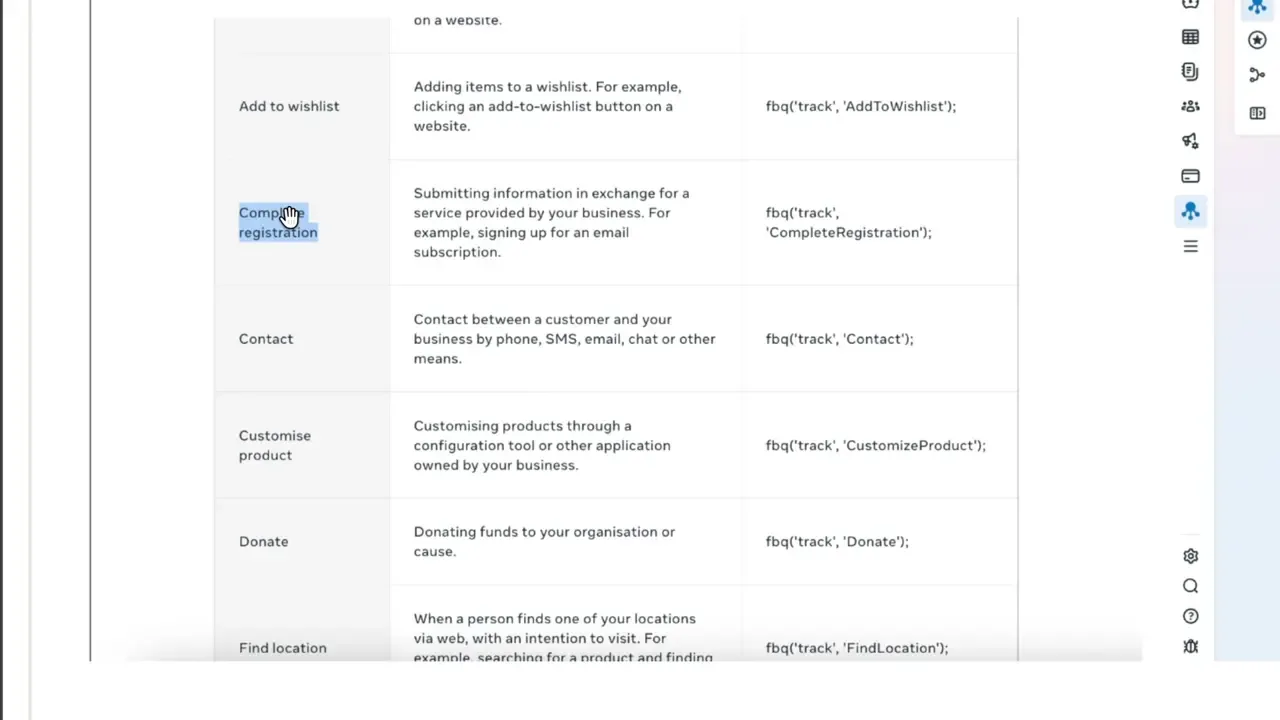
Most people think they should use lead for webinars, but it’s actually complete registration.
Why use a standard pixel event rather than a custom one? Meta tracks data on everyone who uses the standard events and shares it. So if you use complete registration, Meta already understands the people who complete registrations and shares that with your account. Use it so you benefit from that combined learning.
While you’re there, test your data set before you run your webinar. Otherwise, you’ll be in the middle of the campaign, things won’t be tracking properly, and you’re going to be really upset.
Automations
Keep the key automations simple:
- A 3, 2 and 1 day warning, by SMS and email (SMS if you legally can, and likewise for email, depending on where you are)
- 1 hour before the event, by SMS and email
- At the event, by SMS and email
These are pretty basic. You can add more if you want, but I don’t think you’ll get much more value out of adding more automations.
Ad settings
ABO, not CBO
First thing to note: use ad set budget optimisation (ABO), not campaign budget optimisation (CBO).
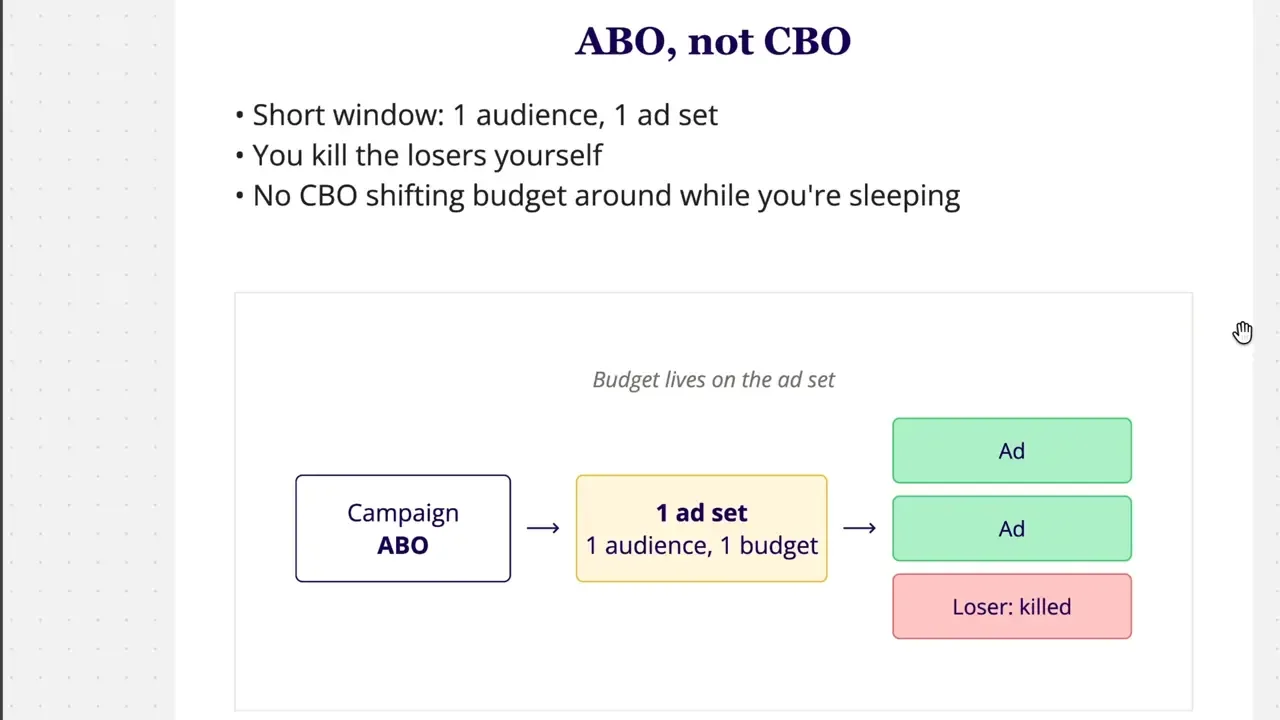
It’s tempting to create several different audiences and think “with CBO, Meta’s going to spend the budget on whichever one performs best”. But you have such a short window to promote a webinar. You don’t want Meta flipping the budget between ad sets overnight.
You need manual control. That’s why I suggest ABO, so you control where the budget is spent.
For the ads, again, aim for about three to five. You can go more if you like. We manage the ads by turning off the losers pretty quickly, which I’ll get into in a second.
The settings
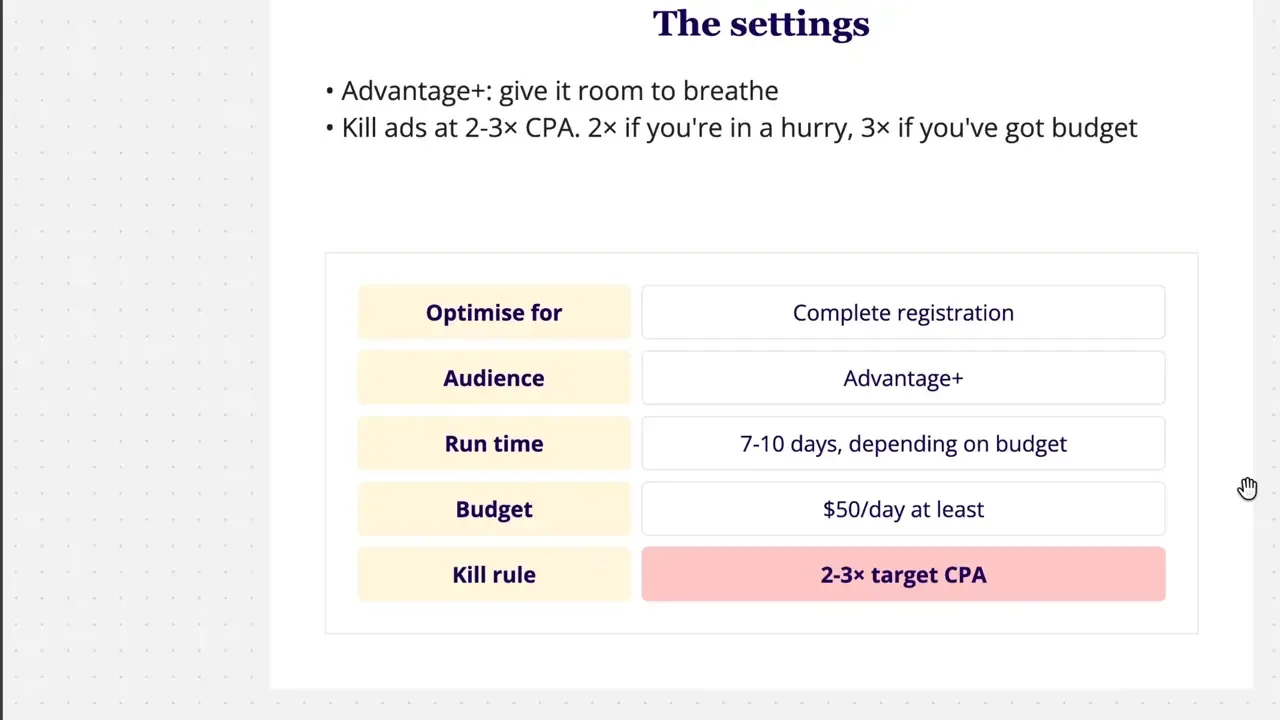
Targeting. I suggest using Advantage+. This gives it room to breathe. Again, you have such a short window, so you want to give Meta the chance to pick up any easy learning and easy conversions it can. If you lock it in without Advantage+, it doesn’t have the flexibility to pick up momentum in that window.
Run time. I suggest running the campaign for 7 to 10 days. There are two views on this:
- One says run the campaign for 3, 4 or 5 days, because if you run it longer, people won’t show up
- The other says run it longer, so you have time to optimise towards the ads that actually work
I suggest a middle ground. Meta wants 7 days to optimise an ad set properly. If you run it for 10 days, you at least have the first 3 days to cut the losers. But it’s not so long that the people who sign up at the beginning won’t show up to the event. So aim for 7 to 10 days.
Budget. I suggest at least $50 a day.
Kill rule. The typical kill rule for turning ads off is when they’ve spent 2 to 3 times your target CPA with no conversions.
And that’s a simple strategy. If you’d like to learn how to measure your ads even when you don’t have many conversions, watch how to analyse Facebook ads with low conversions.